Showing posts with label DIY. Show all posts

Thursday, January 13, 2011

Anniversary

Last January 9th was my 6th anniversary of dating Mr.B exclusively. In a few months (in June) we will be celebrating our 2nd wedding anniversary. I know it's still 5 months to go, but I love the idea of making this cute "little stitched Love Note":


Traditionally, the 2nd anniversary gift is cotton.  So how perfect would this love note be for the 2nd anniversary gift? You can find the DIY tutorial from Beverly's Flamingo Toes blog. I love all her tutorials. Beverly is so talented and generous with her ideas. This tutorial is so simple yet beautiful...

Friday, April 23, 2010

Roses are not just red!


One of the good things that came up from the kitchen sink fiasco last week is that I found a square vase under the sink that I forgot I had.. All the roses were blooming so beautifully in the garden, so I thought I'll try making a multi-color arrangement to celebrate the earth day :)

Monday, March 15, 2010

Monday Centerpiece Series


And we're back with the 2nd ever Monday Centerpiece Series (or as I like to say it: Monterpiece).

Here's an awesome idea from Dog n' Bird Artful Wedding: a single bloom under an upside down wine glass, topped with a candle. Simple and creative. I like :)

Monday, February 8, 2010

Monday Centerpiece Series

Monday. Some of my Mondays are good. But some are bad. Some Mondays, I just need a really bad dose of Monday Blues cure. So, what's better than to start a Monday with looking at pretty centerpieces? I think I'm gonna start off the week with Monday centerpiece alternative from now on. So, make sure you tune in every Monday :)

Here's the first one for the series that I found on Southern Living. My goodness, what a difference a nice centerpiece brings to the dinner table. A good centerpiece can be a conversation starter at an awkward dinner table, an eye pleaser for a sore Monday, an appetite enhancer for a hangover, and mood booster for just about everything else...


I have a small garden at home. I have begonias, roses, gerber daisy, wildflowers, and other kinds of flowers that I don't know the name of. I like to bring them in when they bloom, but they don't always look good as a centerpiece because sometimes I'd only have one single rose that bloomed. What a great idea to stick the odd flowers into the colorful Oasis Rainbow Foam. I'm definitely gonna try to make them... someday. someday but soon! :)

Tuesday, August 4, 2009

Lollipop


I stumbled through this pretty DIY project at Martha Stewart's site this morning and I think it'll be an awesome new trend we'll be seeing in weddings in the coming years...

Inexpensive, Easy, Cool, and can be made way ahead of time. Sounds like my kind of DIY project :)


Here's the instruction straight from Martha Stewart Wedding's website:

Cheree Berry's delightful display of suckers from her wedding is easy to make yourself, but you can also buy one from her website.

Tools and Materials
Styrofoam cone from Baisch & Skinner

Floral spray paint (choose a color that will match your ribbon)

Extra-wide flat washers (these will add weight to the bottom of the cone and keep it steady; to get a heavy-enough weight, Cheree used 2 and hot-glued them together. The more surface of the base that the washer covers, the steadier the cone will be; so, if you can find a "Large OD" washer that's 8 millimeters or wider from a plumbing-supply store, that would be best)

Hot-glue gun

8 yards of 5/8-inch-wide ribbon (use 1-inch-wide ribbon for a 24-inch-tall cone; Baisch & Skinner)

Gold-topped boutonniere pins (about 30)

Lollipops (some of our favorite sources include Ju-C Suckers, Hammond's Candies, CandyDirect.com, and Sugar Shack)

Flag template (download template here)

Slim wooden dowel (for flag)

Craft glue

Lollipop Stand How-To

1. Spray paint cone with floral spray paint, and let dry. Hot-glue the flat washer to the bottom of the cone, and let set.

2. Cut the ribbon into graduated lengths so each wraps once around the cone, with extra for overlap; the shortest piece (for the top of the cone) will be about 5 inches. You will need 25 pieces of ribbon for 16-inch cone, 28 pieces of ribbon for 18-inch cone, and 27 pieces of ribbon (of 1-inch-wide ribbon) for 24-inch cone.

3. Cover cone with ribbon, starting from the top. Wrap the first ribbon snugly around the cone (you will need to wrap the ribbon at a slight angle so that it lays flat on the conical surface). Fold the end under to hide the raw edge, and use a pin to secure. Continue down the cone, overlapping the ribbons only slightly.

4. Insert your favorite lollipops into the cone, slipping the sticks between the ribbons and angling them down. We used rock-candy swizzle sticks, so we used scissors to cut off the balls on the ends of the wooden sticks.

5. Stick a sign into the top of the cone, or insert a single lollipop instead. To use Cheree's flag, download her template and print it out, then use a craft knife and a metal straight edge to cut the flag just inside the lines. Glue it to a slim wooden dowel; if you like, cut a second sheet of paper and glue it to the back of the flag to cover the dowel.

First Published: Martha Stewart Weddings - Summer 2009

Monday, August 3, 2009

Youtube

This weekend, I learned so much about photoshop.... from Youtube! Who knew????


It started out with just trying to find out what kind of setting wedding photographers / editors use to make their images so soft and romantic.... it ended up being a full on photoshop crash course, which I think is very useful and interesting and fun. The things you can do to those photos..... like making the blue sky in the photo below bluer.... I like it. A lot! :)


*swoon....

Thursday, July 2, 2009

Dahlia

Inspired by Meg's post this week about Dahlias, I thought I'd share a picture of the lovely dahlia hairpin that I made for my bridesmaids.

It was actually really really easy to make them. Even on my first try, it only took me about 5 minutes to make one. The key is to making these lovelies is only one: glue gun. Just glue, glue, glue them all together, and let it dry. That's all.... Well, maybe not too much glue, but you know what I mean, right?

They look pretty, don't they? :) Since these were the first ones I ever made, the inside part that's glued to the prongs do not look very pretty, but... hey! As long as it works :)

Tuesday, May 12, 2009

Busy Bee

Crazy bachelorette party. Laid back wedding shower. I can't thank God enough for all the blessing I have received in my life.

My mom's an expert at making those napkin flowers. She's like a napkin flower-making machine :) Thanks Mom!

Any myself? What have I been doing? Too many thing... I don't even remember....

Tuesday, May 5, 2009

DIY Idea

Wow, I love this DIY idea from project wedding:


Love it love it love it. And such a unique idea for the kissing game, and worded very nicely, I must say :)

Monday, May 4, 2009

Progress

Mr. B has been so very helpful. In fact, he's doing more things on my to-do list than I am. Thank God for him.

Napkin flowers count to-date: 55! Woo hoo! another 110 to go :)

And.... overall, things are just going well so far. My dress is still in-the-making. My dressmaker lady called a few days ago saying that she's having a hard time finding the right fabric for the dress alterations... but.... I'm not too concerned. She'll figure it out, I'm sure. My beauty n exercise regime is really paying off. I don't look that much different, but I sure feel different inside ;)

And.... that's it. Plenty of things in my to-do list, but I'm sure I'll get through them. One thing at a time, I say.

<3

Sunday, April 12, 2009

Pompoms...

Sigh..... remember these pompoms from Martha Stewart? Well, I just made 30 of them before realizing that actually, I should've folded the accordions on the shorter side (the 5" side). Hmm....

Tuesday, April 7, 2009

Napkin Ring

I've been wanting to do a DIY project for the napkin rings..... something like:

this from Martha Stewart:


or this from etsy seller: The Divine You


or this from Vintage Glam Wedding's blog:

http://vintageglamblog.com/2009/04/entry-10-diy-vintage-napkin-rings/comment-page-1/#comment-6906


*sighh... they all look so pretty :) And I think it really adds to the aesthetics of the table arrangements, don't you? I realllyyyyy wanna do something for the napkin ring.... but sometimes my lazy side kicks in, and I say "screw it! why do we have flowers for centerpiece anyway if we have to do all the hassle of creating 200 napkin rings just to make the table prettier?" hehehe... er.... I probably will still end up with Martha Stewart's paper flower... :D

Monday, March 23, 2009

DIY Wedding Sign

My friend gave me a brilliant idea last night.... he suggested that we take this picture:


Blow it up to about 20 x 15 size, stick in on a pole, and put it in front of the wedding venue as a welcome sign for our guest... kinda like this:


Brilliant, I tell you :)

Thursday, March 19, 2009

Updates

Wedding first dance is coming along great. Who knew you can learn quite a bit of moves from youtube? :)

Can't wait to start my DIY flower projects tomorrow :) :)

And can't wait to start the weekend :) :) :)

Friday, March 13, 2009

85

85 days till "I Do"... with thousands of things to do.

Well, I have a lot of things accomplished already, but I guess the details are really driving me nuts. Does it matter if we have a chair cover or not? DIY Flower a-la Martha Stewart on the napkin? Medium or large altar arrangement? Coral pink, salmon, just pink, or whatever this color I have in my head ? Arrrghhhh.... remind me again why I'm doing this wedding? Why can't it be just the two of us, with the priest, with our parents and siblings and closest friends, in St. Boniface, saying "I do"?

I know, I know... It is definitely time to step back, relax, take it easy, and remember the most important thing about the wedding is our love. What I want the most is to be able to look back on June 6 2009 when I'm 90 years old and say, "all I remember is Love." Indeed, Love is all that matters.

Monday, March 9, 2009

Vintage Founds

I went to a thrift store in Anaheim last weekend, and..... look what I found!!


Cool vintage frames! Remember I said a while back that we are going to name the tables according to broadway shows ? Well, these are a preliminary sample of what the table numbers are going to be. Total estimated cost for 20 tables? under 20 - 30 bucks. Can you imagine? A buck per frame (and I just printed out the playbills from my home printer). the frame in the middle is $2, but the other ones are $1 each. They also had lots of tall vintage vases for ranging between $2-10. My goodness.... It's like I died and went to vintage shopping heaven. I had collected about 10 different frames and 5 vases when my fiance came to my side, pulled me out of the daze I was in, and brought me back into reality. He literally had to put the frames and vases back to the shelves and drag me to the car so that I don't go crazy buying these darling frames and vases..... I only managed to 'save' these three frames but I think I'll go back there without him one of these days *shhh! don't tell!*

Anyway, here's the story behind the 2nd frame (the one in the middle). You can't really see it in the pictures above, but here's a close up picture of it.
This is the movie ticket from our first date together. Phantom of the Opera. January 8, 2005. I recently found it inside the pocket of my sister's dressy jacket that I wore on that date 4 years ago. It was a thick jacket, so I only wear the jacket once in a while, which explains why the ticket stayed intact for so long. I'm glad I found it though.... Isn't it a wonderful memorabilia? I think I will place this frame, along with the frames of our grandparents and parents' wedding pictures around the wedding cake as a little nod and a wink to them ;)

Friday, February 20, 2009

Chair Decoration DIY

Remember how I was thinking of having the hanging favor box on the chair instead of having the chair covers? Here are some different ideas for the decor:
1. Hang dried wheat on a bow on the back center of the table
2. Hang flowers

The above 2 options end up to be more expensive that I want it to be.... I need the decoration for each chair to be under a dollar. So.. as my creative side of the brain works better on Fridays, I came up with this idea from this image:

So... to modify it a bit to serve our purpose as a hanging chair decoration, here is a step by step guide of how to make it:

1. Make a cone out of paper doilies (these 8" doilies papers are about 5cents each from http://www.wrapwithus.com/favors/3_762-fx.html or 2 cents if you can buy in bulk from here http://www.mypapershop.com/500237.html)
2. Tie a ribbon around on the doilies so you can loop it into the back center of the chair.

3. Get a few bunches of baby's breath (you'll need about 3 stems of bb per cone, and it's around 10cents each stem if you buy in bulk.)
And voila! You're done. (I think.) I haven't actually tried to make these, but.... yeah. I think it's easy enough to do, don't you? I'm gonna try to do it this weekend :)

Thursday, February 19, 2009

Arch Decoration

So I went to the florist yesterday, and thought... what else can I get rid of to reduce the cost? As we go through the list, there's this one line (actually there were quite a few) that I think we can cut. Particularly: Decoration for the entry arch.

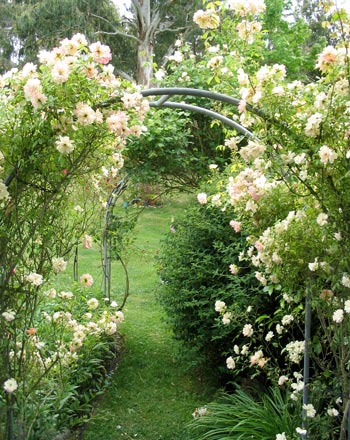
Granted.. the reception place is beautiful on its own. There is a vintage dreamy looking arch on the entry way. It makes the place looks like how I imagined it would be in the book "Secret Garden" by Frances Hodgson Burnett. Anyhow, I was thinking that we could decorate it with:"

Option 1: Flowers


image by http://www.mooseyscountrygarden.com

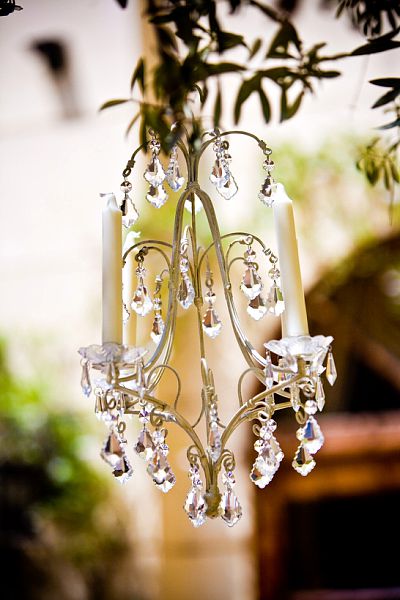
Option 2: Crystal Lights

image by http://www.elizabethannedesigns.com
http://www.stylemepretty.com/2007/12/26/do-it-yourself-wedding-projects-14/

Or Option 3: Hanging "Wedding" Sign
image from: http://vintageglamblog.com/2009/02/14/honey-please-do/


Hmm.. am I getting too creative here? I guess I gotta figure out how tall the entry arch is before I start hanging things on it :D

Wednesday, January 21, 2009

DIY # 2: Pom Pom Flowers


Who can resist these lovely arrangements of beauts by Martha Stewart? I think I'm gonna do the small pompom flowers for the napkins, just because. :)

I've tried making a couple of these cuties, and I must say it was pretty successful (after the 3rd try) hehe... Now, if only I can find the place to buy the tissue paper at wholesale price and with the exact color that I had in mind... it'll be sweeeetttt!

Friday, January 16, 2009

DIY Projects

As I read my daily dose of wedding blogs, I always get inspired to do my own DIY projects. Actually, I think it should be DIT (do it together! hehe) projects. One project in particular that I'm going to do is my own guestbook and frame my own engagement pictures. I'm actually inspired to do these 2 projects because as I was reviewing my photographer's price list against my contract, the numbers does not make sense... why does it cost so much to frame an 11x14 engagement picture print on a 20x24 frame?

And so.. Mr. B and I went to Michaels to look at the frames that they have... and guess what? They are having a 50% off all styles of frame. Voila! It's decided there and then to just get the engagement pictures touched up ourselves (hello, photoshop!) and frame it nicely with one of those frames that are on sale. I read online that Bay Photo is a great source to do some color correction etc, and get good prints too.

In Indonesia, most of the people I know have their engagement pictures printed on canvas like this:
Cool, huh? You can order it online. That is if there is no copyright from the photographer, of course.

Anyway, same thing for the guestbook. I think I might take some of the pictures from the engagement shoot, and put them together into a book with plenty of space for guests to sign their name in. I will also order this online :)