Friday, April 23, 2010
Roses are not just red!
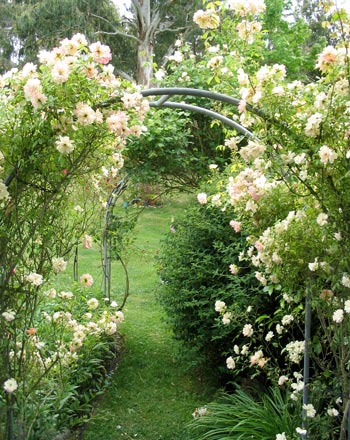
One of the good things that came up from the kitchen sink fiasco last week is that I found a square vase under the sink that I forgot I had.. All the roses were blooming so beautifully in the garden, so I thought I'll try making a multi-color arrangement to celebrate the earth day :)
Tuesday, August 4, 2009
Lollipop

I stumbled through this pretty DIY project at Martha Stewart's site this morning and I think it'll be an awesome new trend we'll be seeing in weddings in the coming years...
Inexpensive, Easy, Cool, and can be made way ahead of time. Sounds like my kind of DIY project :)
Here's the instruction straight from Martha Stewart Wedding's website:
Cheree Berry's delightful display of suckers from her wedding is easy to make yourself, but you can also buy one from her website.
Tools and Materials
Styrofoam cone from Baisch & Skinner
Floral spray paint (choose a color that will match your ribbon)
Extra-wide flat washers (these will add weight to the bottom of the cone and keep it steady; to get a heavy-enough weight, Cheree used 2 and hot-glued them together. The more surface of the base that the washer covers, the steadier the cone will be; so, if you can find a "Large OD" washer that's 8 millimeters or wider from a plumbing-supply store, that would be best)
Hot-glue gun
8 yards of 5/8-inch-wide ribbon (use 1-inch-wide ribbon for a 24-inch-tall cone; Baisch & Skinner)
Gold-topped boutonniere pins (about 30)
Lollipops (some of our favorite sources include Ju-C Suckers, Hammond's Candies, CandyDirect.com, and Sugar Shack)
Flag template (download template here)
Slim wooden dowel (for flag)
Craft glue
Lollipop Stand How-To
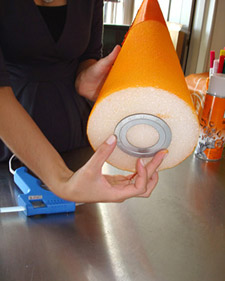
1. Spray paint cone with floral spray paint, and let dry. Hot-glue the flat washer to the bottom of the cone, and let set.
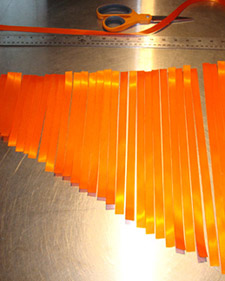
2. Cut the ribbon into graduated lengths so each wraps once around the cone, with extra for overlap; the shortest piece (for the top of the cone) will be about 5 inches. You will need 25 pieces of ribbon for 16-inch cone, 28 pieces of ribbon for 18-inch cone, and 27 pieces of ribbon (of 1-inch-wide ribbon) for 24-inch cone.
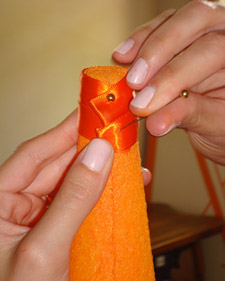
3. Cover cone with ribbon, starting from the top. Wrap the first ribbon snugly around the cone (you will need to wrap the ribbon at a slight angle so that it lays flat on the conical surface). Fold the end under to hide the raw edge, and use a pin to secure. Continue down the cone, overlapping the ribbons only slightly.
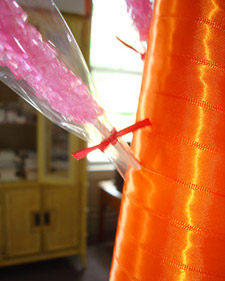
4. Insert your favorite lollipops into the cone, slipping the sticks between the ribbons and angling them down. We used rock-candy swizzle sticks, so we used scissors to cut off the balls on the ends of the wooden sticks.
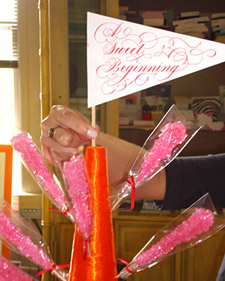
5. Stick a sign into the top of the cone, or insert a single lollipop instead. To use Cheree's flag, download her template and print it out, then use a craft knife and a metal straight edge to cut the flag just inside the lines. Glue it to a slim wooden dowel; if you like, cut a second sheet of paper and glue it to the back of the flag to cover the dowel.
First Published: Martha Stewart Weddings - Summer 2009
Thursday, July 2, 2009
Dahlia
 It was actually really really easy to make them. Even on my first try, it only took me about 5 minutes to make one. The key is to making these lovelies is only one: glue gun. Just glue, glue, glue them all together, and let it dry. That's all.... Well, maybe not too much glue, but you know what I mean, right?
They look pretty, don't they? :) Since these were the first ones I ever made, the inside part that's glued to the prongs do not look very pretty, but... hey! As long as it works :)
Thursday, June 11, 2009
FB

On a side note.... how cute is this wedding cake? The inspiration for this cake came from our first date. We went to see The Phantom of The Opera, and so the cake decoration (the cream) is actually music notes from the song "All I Ask Of You". Awww... :) :) Plus, it's definitely one of the tastiest wedding cake I've ever had :)

Tuesday, May 12, 2009
Busy Bee
My mom's an expert at making those napkin flowers. She's like a napkin flower-making machine :) Thanks Mom!
Any myself? What have I been doing? Too many thing... I don't even remember....
Monday, May 4, 2009
Progress
Napkin flowers count to-date: 55! Woo hoo! another 110 to go :)
And.... overall, things are just going well so far. My dress is still in-the-making. My dressmaker lady called a few days ago saying that she's having a hard time finding the right fabric for the dress alterations... but.... I'm not too concerned. She'll figure it out, I'm sure. My beauty n exercise regime is really paying off. I don't look that much different, but I sure feel different inside ;)
And.... that's it. Plenty of things in my to-do list, but I'm sure I'll get through them. One thing at a time, I say.
<3
Friday, February 20, 2009
Chair Decoration DIY
1. Hang dried wheat on a bow on the back center of the table
2. Hang flowers
The above 2 options end up to be more expensive that I want it to be.... I need the decoration for each chair to be under a dollar. So.. as my creative side of the brain works better on Fridays, I came up with this idea from this image:
So... to modify it a bit to serve our purpose as a hanging chair decoration, here is a step by step guide of how to make it:
1. Make a cone out of paper doilies (these 8" doilies papers are about 5cents each from http://www.wrapwithus.com/favors/3_762-fx.html or 2 cents if you can buy in bulk from here http://www.mypapershop.com/500237.html)
2. Tie a ribbon around on the doilies so you can loop it into the back center of the chair.
3. Get a few bunches of baby's breath (you'll need about 3 stems of bb per cone, and it's around 10cents each stem if you buy in bulk.)
And voila! You're done. (I think.) I haven't actually tried to make these, but.... yeah. I think it's easy enough to do, don't you? I'm gonna try to do it this weekend :)
Thursday, February 19, 2009
Arch Decoration
Granted.. the reception place is beautiful on its own. There is a vintage dreamy looking arch on the entry way. It makes the place looks like how I imagined it would be in the book "Secret Garden" by Frances Hodgson Burnett. Anyhow, I was thinking that we could decorate it with:"
Option 1: Flowers
Option 2: Crystal Lights
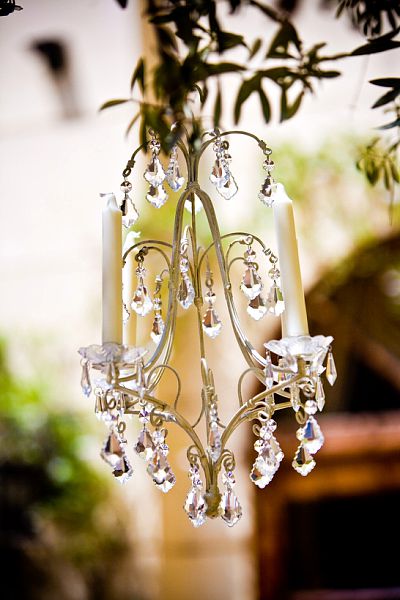 image by http://www.elizabethannedesigns.com
http://www.stylemepretty.com/2007/12/26/do-it-yourself-wedding-projects-14/
Or Option 3: Hanging "Wedding" Sign
Hmm.. am I getting too creative here? I guess I gotta figure out how tall the entry arch is before I start hanging things on it :D
Tuesday, January 6, 2009
Etsy
awww... :)


