
I stumbled through this pretty DIY project at Martha Stewart's site this morning and I think it'll be an awesome new trend we'll be seeing in weddings in the coming years...
Inexpensive, Easy, Cool, and can be made way ahead of time. Sounds like my kind of DIY project :)
Here's the instruction straight from Martha Stewart Wedding's website:
Cheree Berry's delightful display of suckers from her wedding is easy to make yourself, but you can also buy one from her website.
Tools and Materials
Styrofoam cone from Baisch & Skinner
Floral spray paint (choose a color that will match your ribbon)
Extra-wide flat washers (these will add weight to the bottom of the cone and keep it steady; to get a heavy-enough weight, Cheree used 2 and hot-glued them together. The more surface of the base that the washer covers, the steadier the cone will be; so, if you can find a "Large OD" washer that's 8 millimeters or wider from a plumbing-supply store, that would be best)
Hot-glue gun
8 yards of 5/8-inch-wide ribbon (use 1-inch-wide ribbon for a 24-inch-tall cone; Baisch & Skinner)
Gold-topped boutonniere pins (about 30)
Lollipops (some of our favorite sources include Ju-C Suckers, Hammond's Candies, CandyDirect.com, and Sugar Shack)
Flag template (download template here)
Slim wooden dowel (for flag)
Craft glue
Lollipop Stand How-To
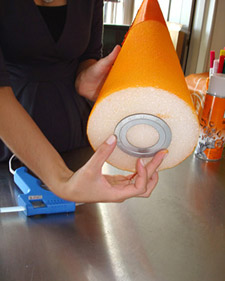
1. Spray paint cone with floral spray paint, and let dry. Hot-glue the flat washer to the bottom of the cone, and let set.
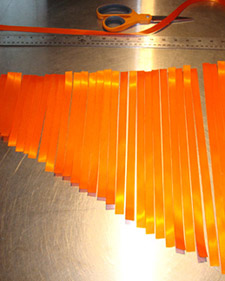
2. Cut the ribbon into graduated lengths so each wraps once around the cone, with extra for overlap; the shortest piece (for the top of the cone) will be about 5 inches. You will need 25 pieces of ribbon for 16-inch cone, 28 pieces of ribbon for 18-inch cone, and 27 pieces of ribbon (of 1-inch-wide ribbon) for 24-inch cone.
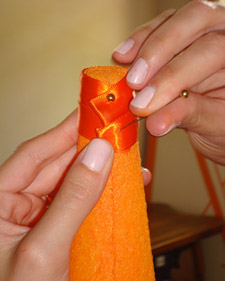
3. Cover cone with ribbon, starting from the top. Wrap the first ribbon snugly around the cone (you will need to wrap the ribbon at a slight angle so that it lays flat on the conical surface). Fold the end under to hide the raw edge, and use a pin to secure. Continue down the cone, overlapping the ribbons only slightly.
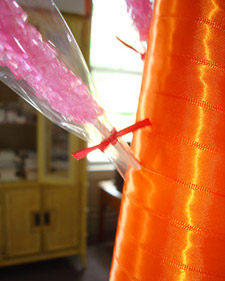
4. Insert your favorite lollipops into the cone, slipping the sticks between the ribbons and angling them down. We used rock-candy swizzle sticks, so we used scissors to cut off the balls on the ends of the wooden sticks.
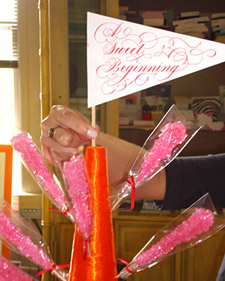
5. Stick a sign into the top of the cone, or insert a single lollipop instead. To use Cheree's flag, download her template and print it out, then use a craft knife and a metal straight edge to cut the flag just inside the lines. Glue it to a slim wooden dowel; if you like, cut a second sheet of paper and glue it to the back of the flag to cover the dowel.
First Published: Martha Stewart Weddings - Summer 2009


